Usage
Free Version can refer to the following steps:
- Example Vault Selection
- Scenario 2
- Scenario 3
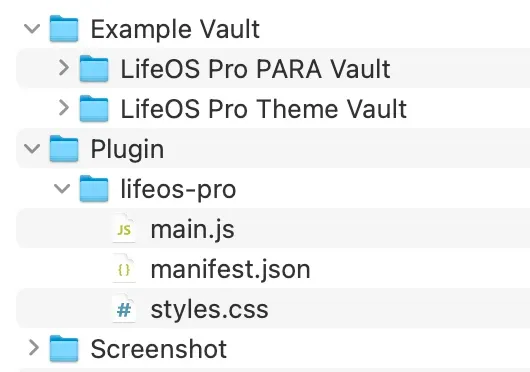
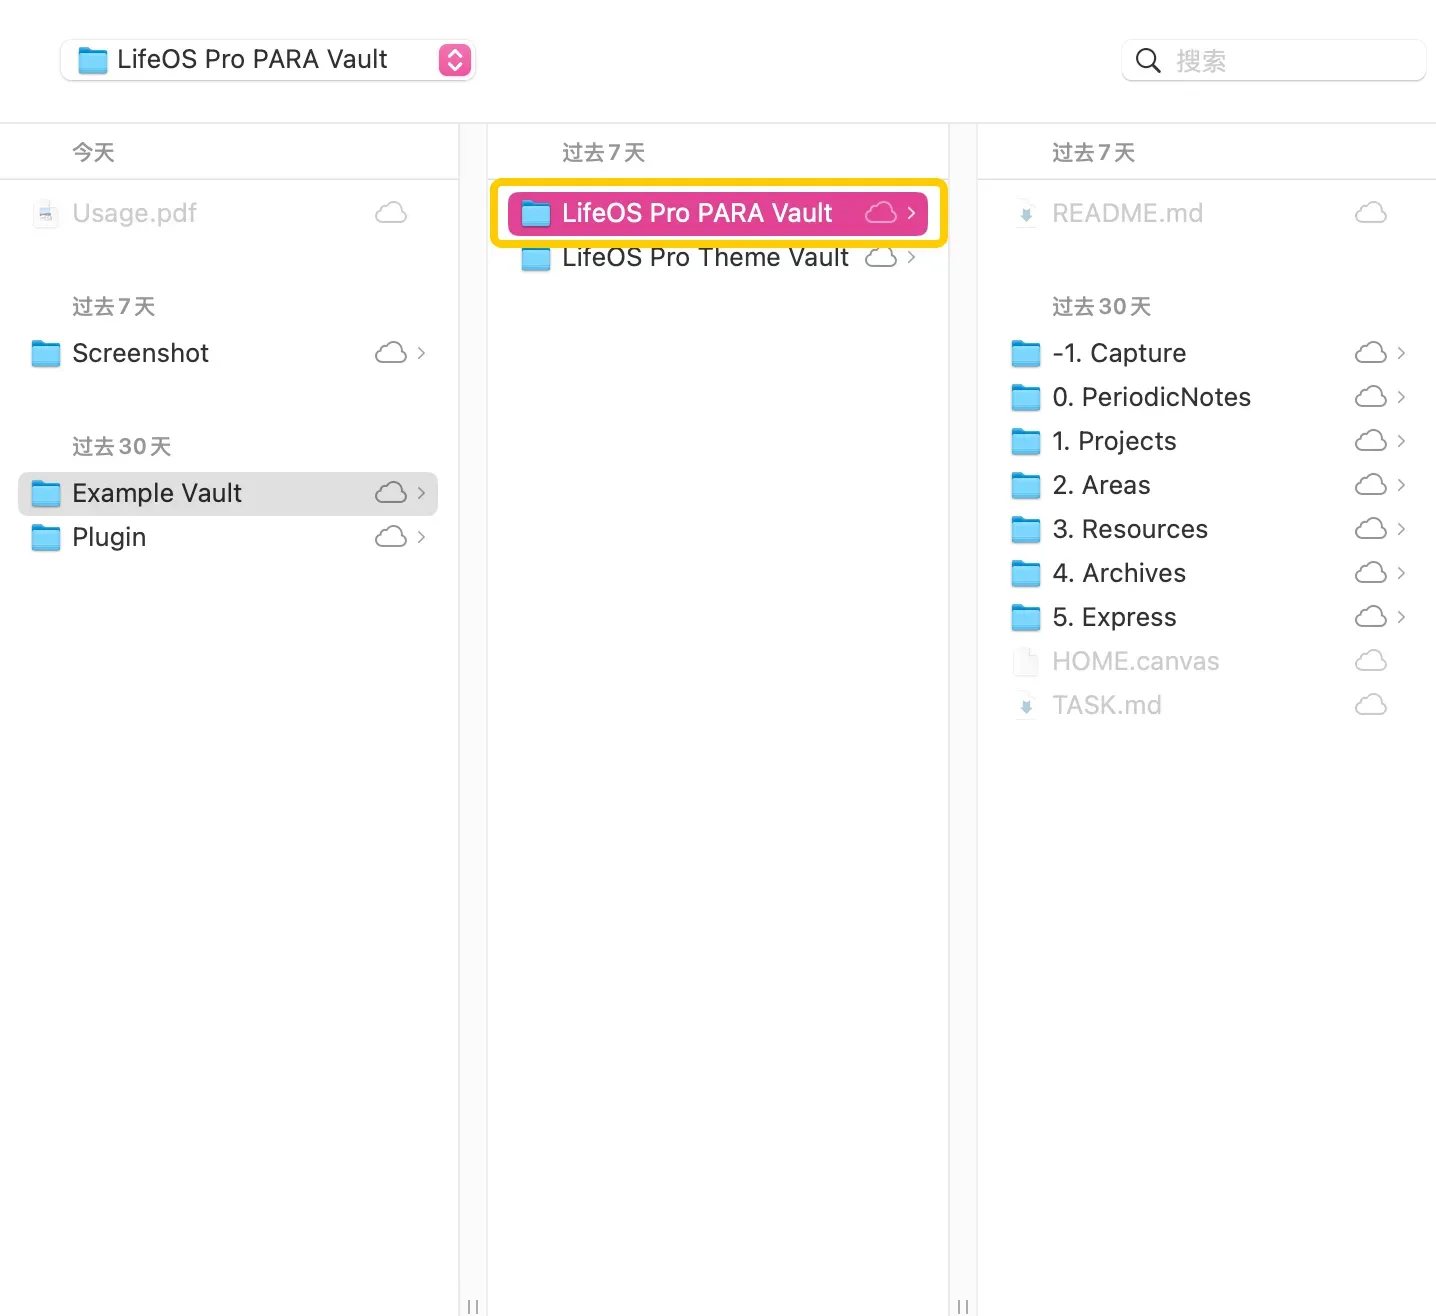
Unzip the attachment, the file list is as follows
According to your usage scenario, select one of the scenarios, and follow the steps one by one!
Example Vault Selection
LifeOS Pro PARA Vault
Complete CODE/PARA practice, the process is relatively complete and standardized, generally recommended to use this example repository!
LifeOS Pro Theme Vault
Can be simply understood as a simplified version of the CODE/PARA practice, it greatly reduces the entry threshold for beginners. Users only need to focus on input, output, and themes, and easily record, organize, and use notes.
At the same time, you can also base this on it to design your own note system and workflow without PARA, which is a very imaginative feature!
Scenario 1: Upgrade from LifeOS to LifeOS Pro
If you have used the free version, simply enable the new plugin in the existing repository, PRO version is compatible with all functions of the free version:
- Copy the 'plugin/lifeos-pro' directory to the ' .obsidian/plugins' directory
.obsidian directory is a hidden folder, if you cannot see it, you need to display it through the following method
- MacBook: Use the shortcut key Command + Shift + .
- Windows: In the current folder, select "View > Show", then select "Hidden items" to view hidden files and folders
-
Copy the existing LifeOS configuration file from ' .obsidian/plugins/periodic-para/data.json' to ' .obsidian/plugins/lifeos-pro/data.json'
-
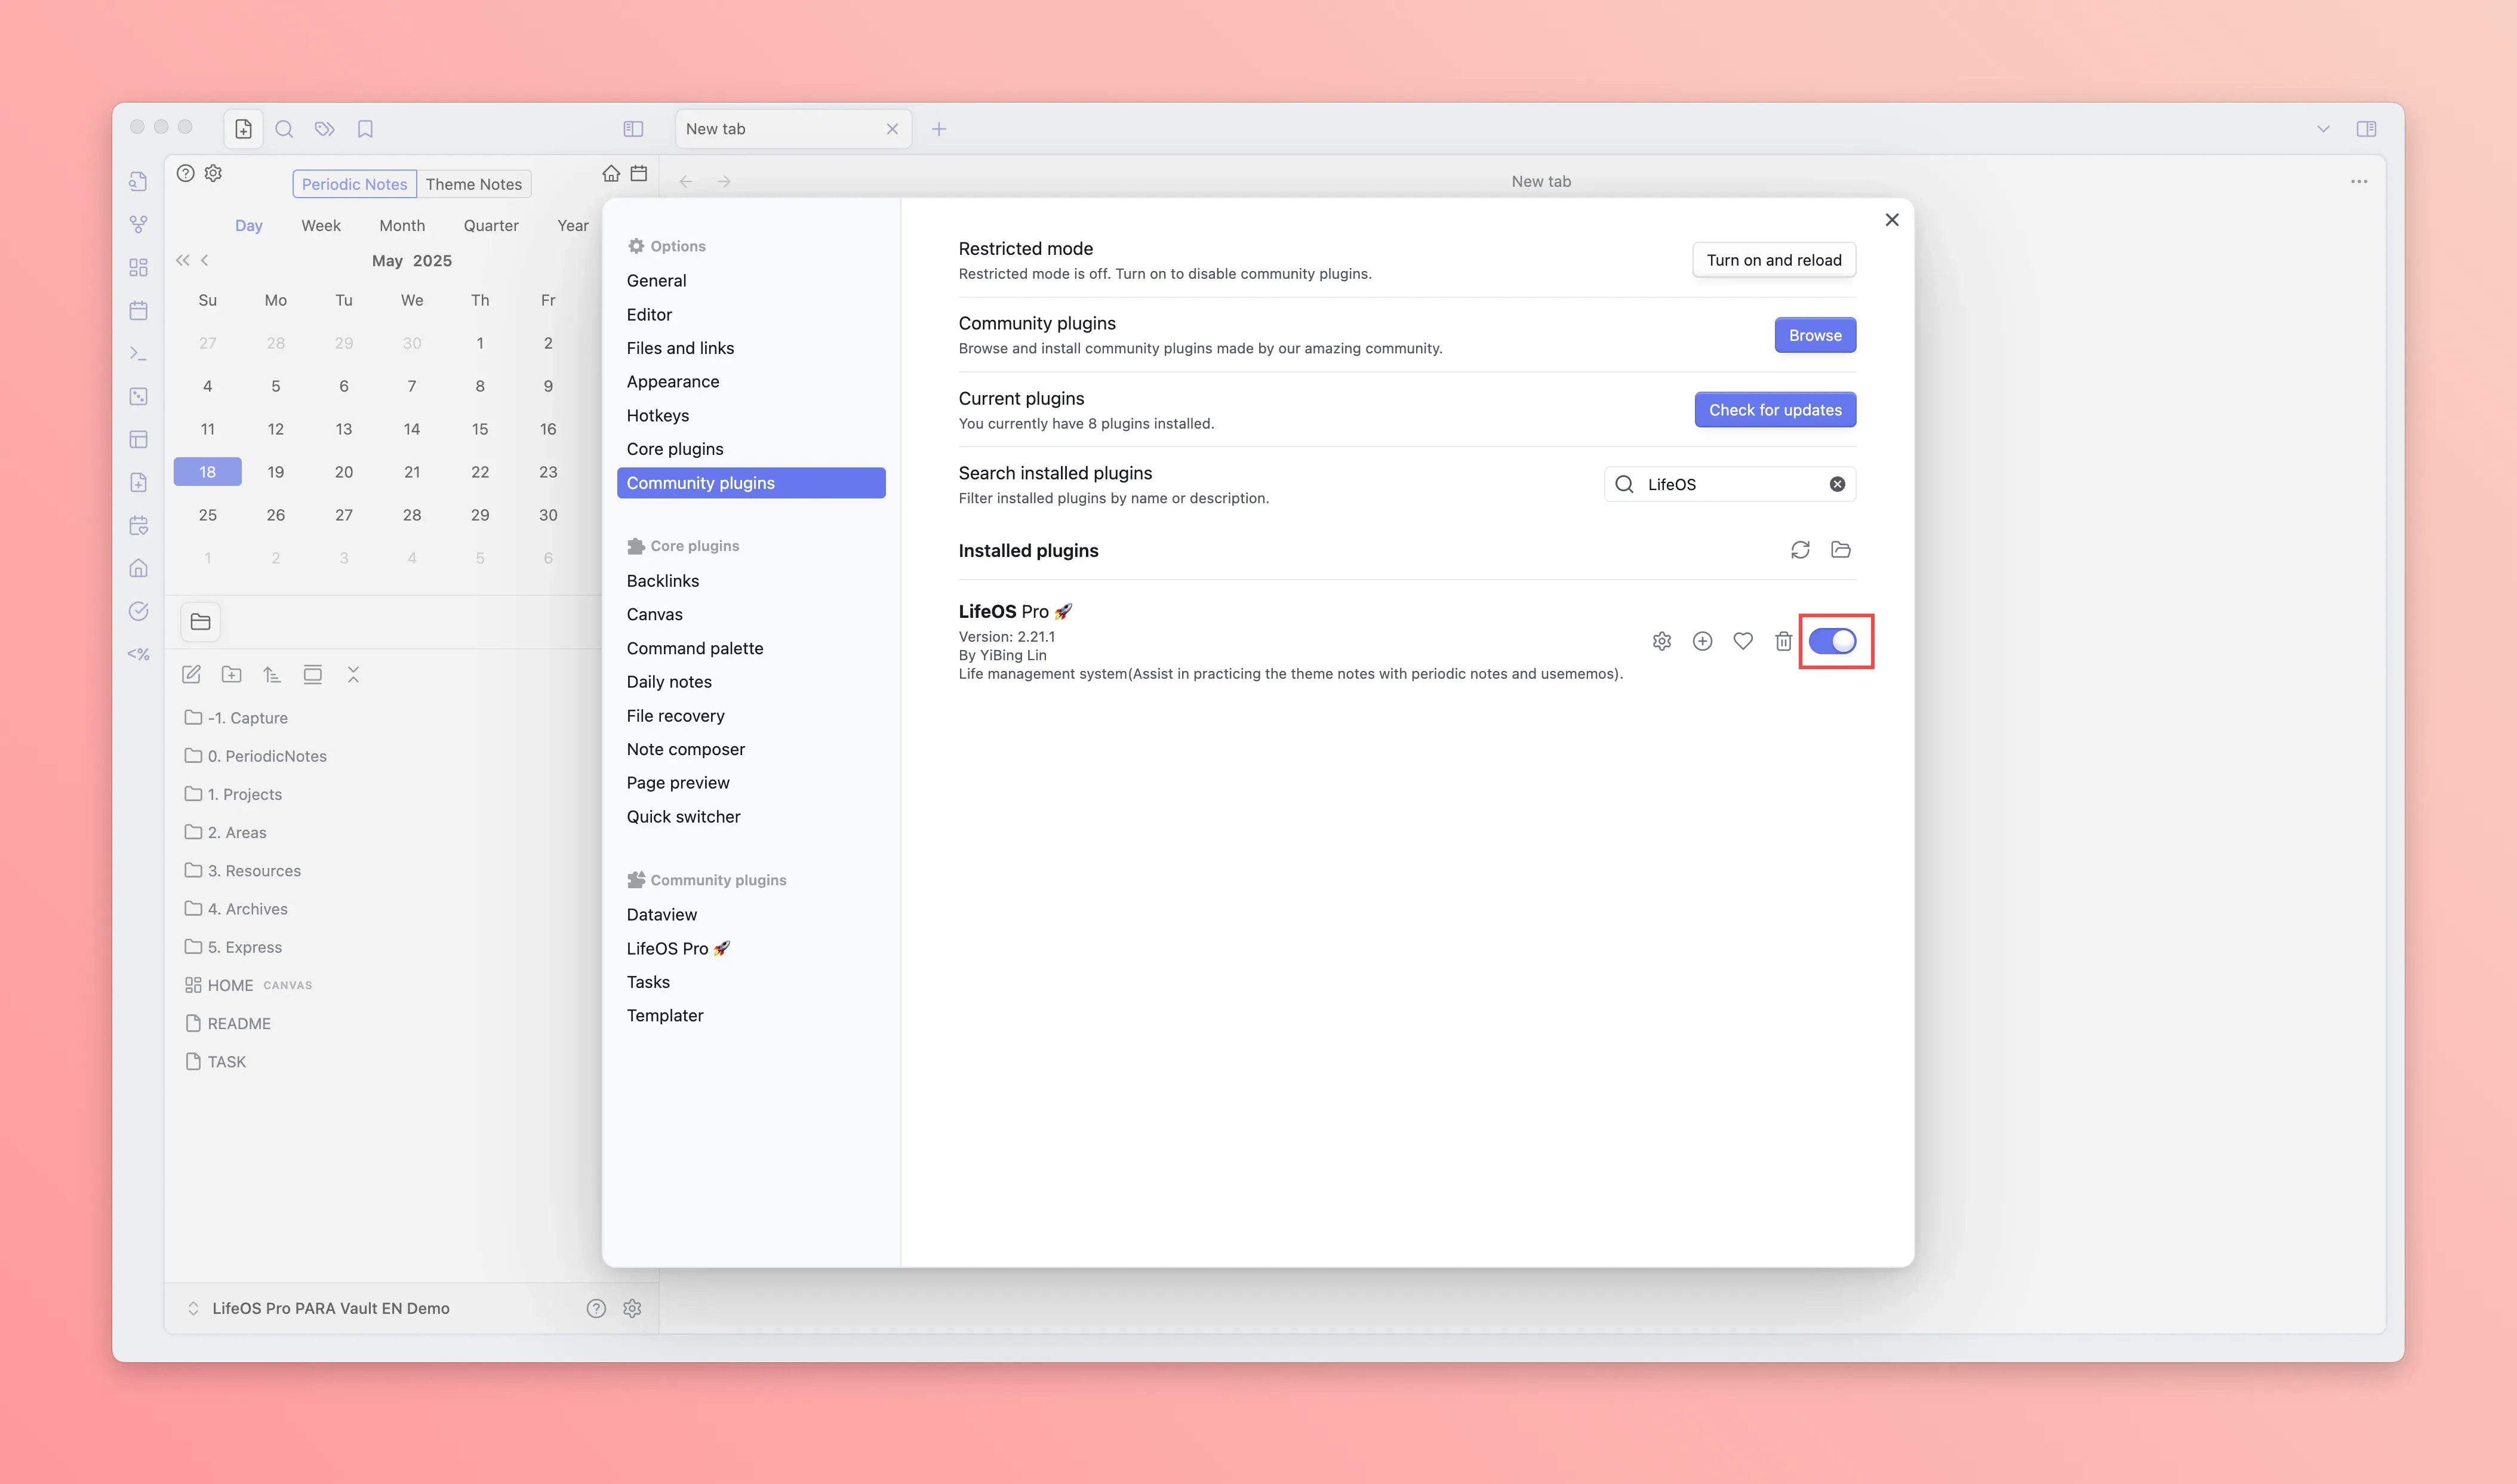
Find LifeOS Pro in the third-party plugin list and enable it

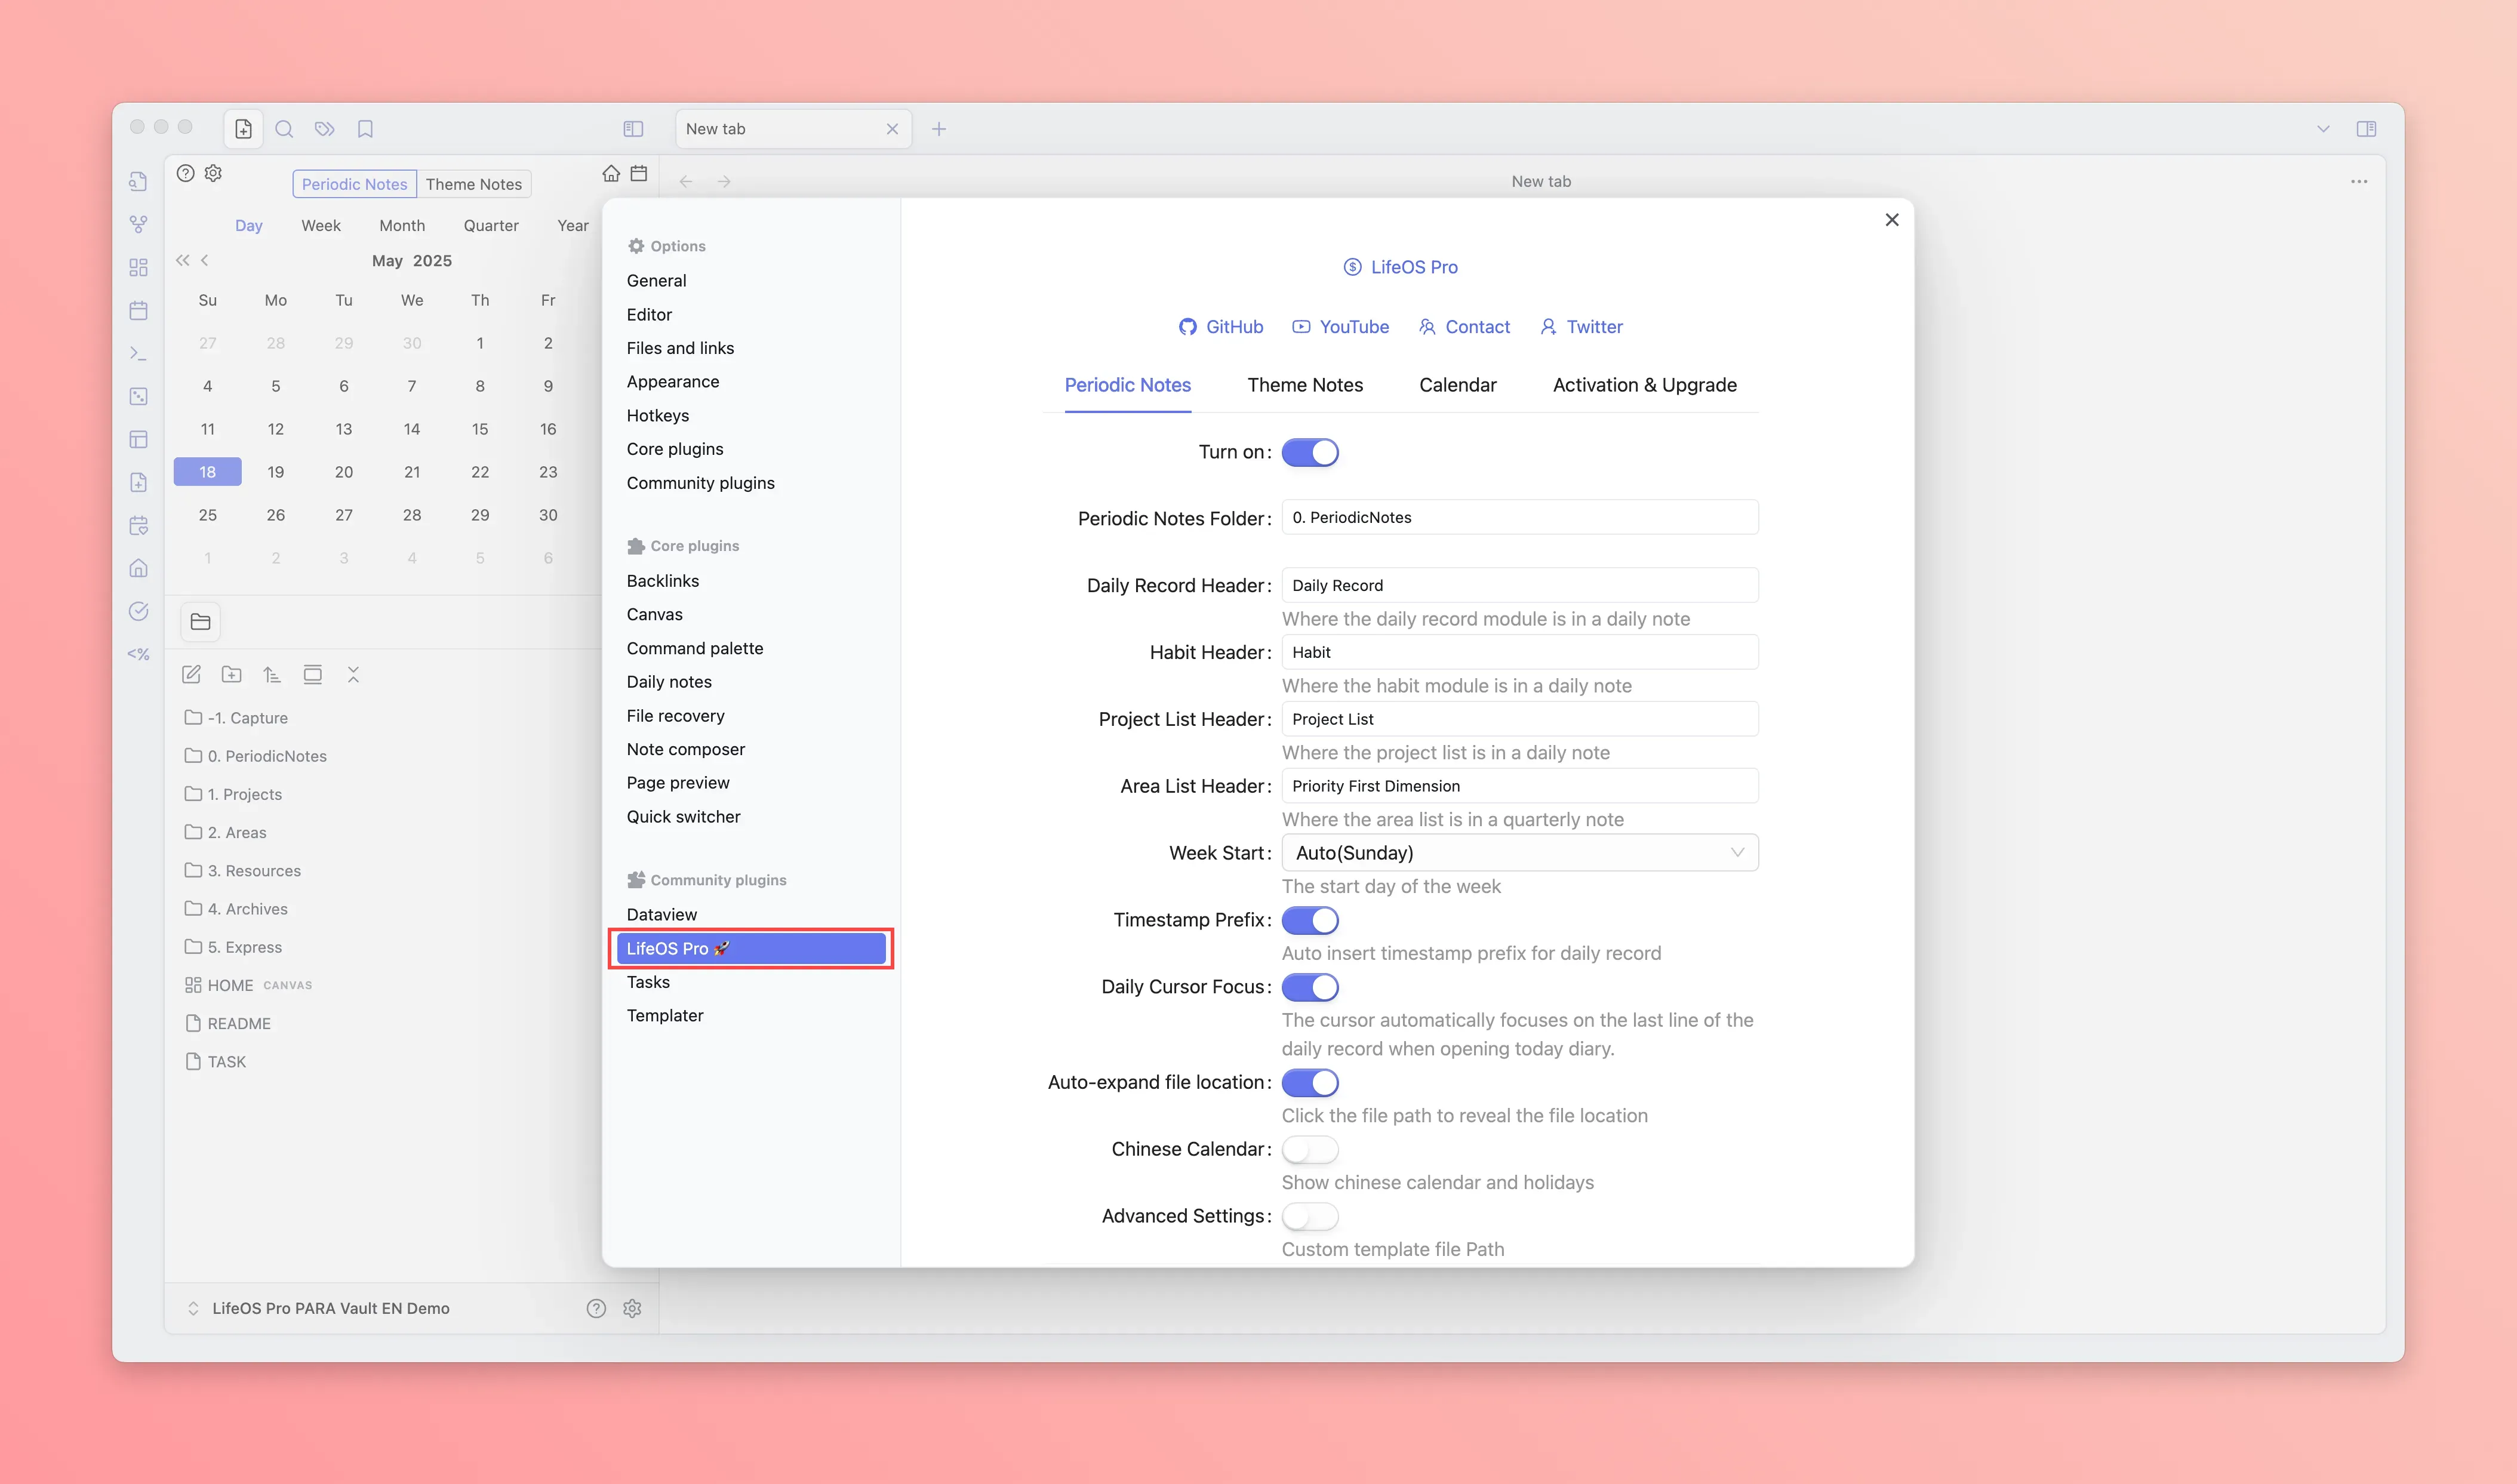
- Open the LifeOS Pro plugin configuration page in the 'third-party plugin'
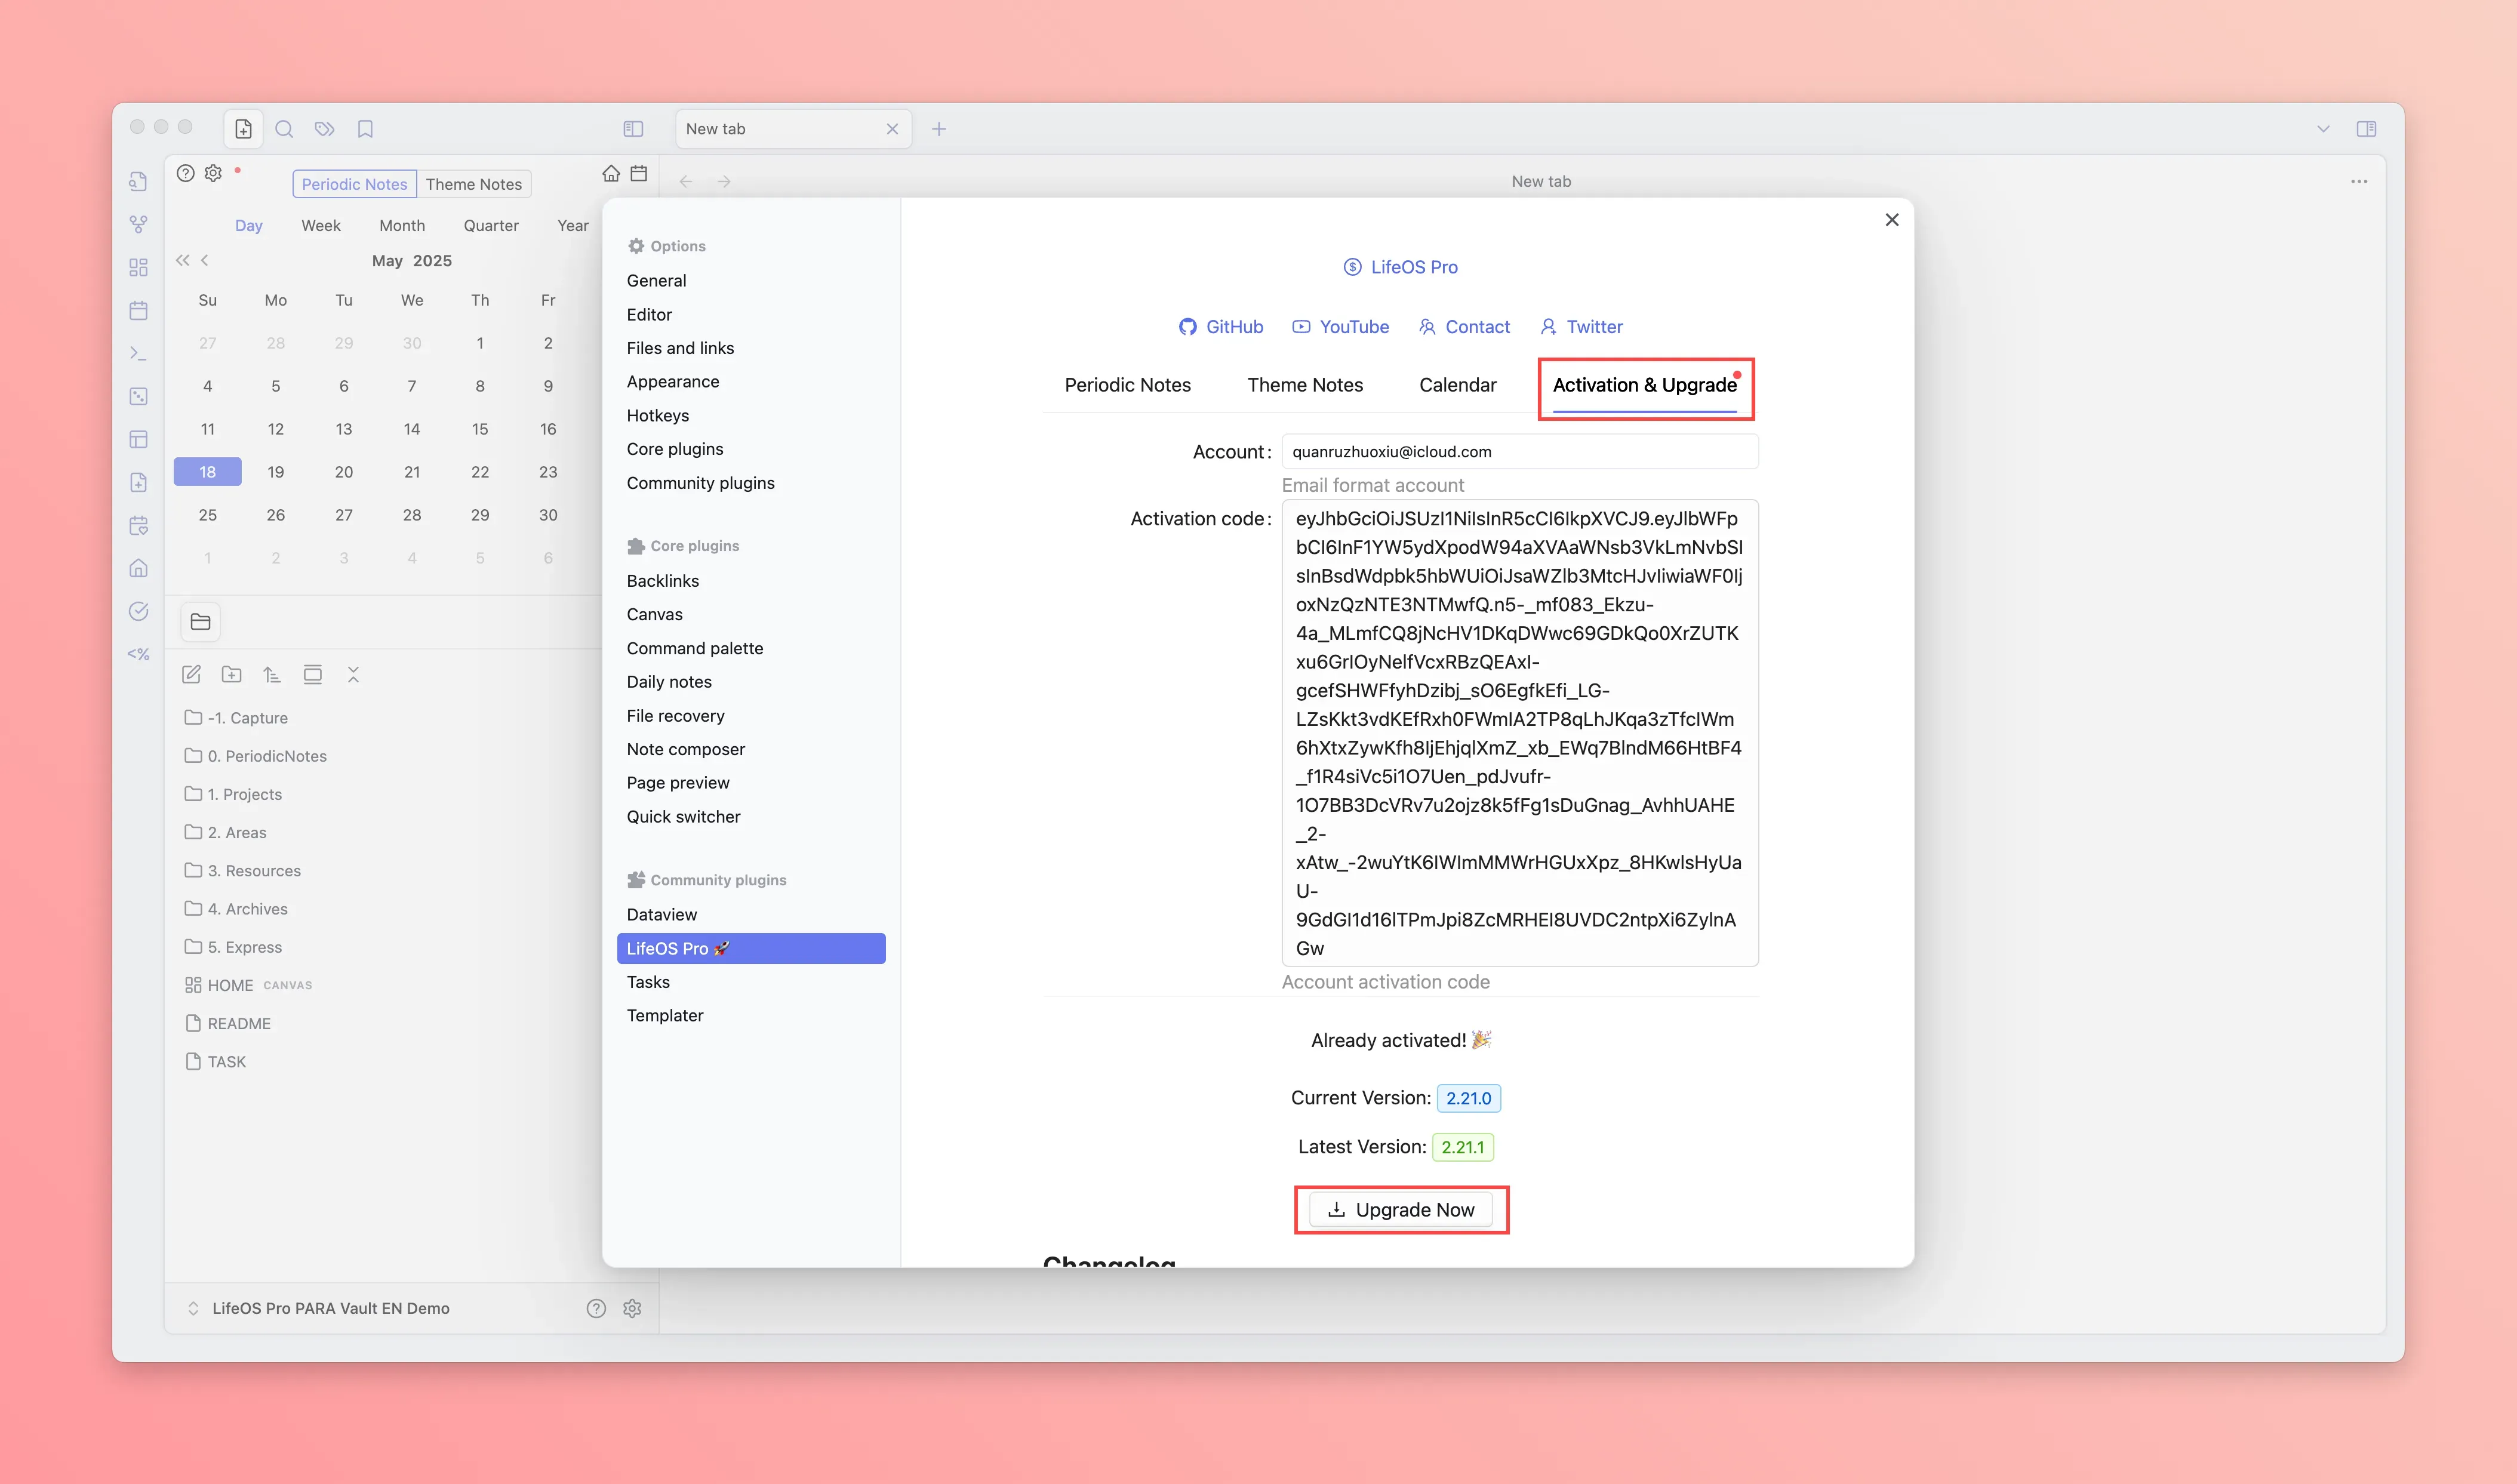
- Click the 'activate upgrade' panel, input the email and activation code (usually in the email you received), and click the 'upgrade now' button at the bottom to upgrade to the latest version of the plugin

-
Restart Obsidian
-
The left sidebar will show the 'calendar', 'home', 'file new' icons, click to experience
-
Go to Pro Version to view more usage instructions
Scenario 2: Use LifeOS Pro in an Existing Repository
- Copy the ' .obsidian/plugins/lifeos-pro' directory from the 'Example Vault/LifeOS PRO PARA Vault/.obsidian/plugins/lifeos-pro' to the ' .obsidian/plugins' directory of the existing repository
.obsidian directory is a hidden folder, if you cannot see it, you need to display it through the following method
- MacBook: Use the shortcut key Command + Shift + .
- Windows: In the current folder, select "View > Show", then select "Hidden items" to view hidden files and folders
- Find LifeOS Pro in the third-party plugin list and enable it
-
Copy the files in the 'Example Vault/LifeOS PRO PARA Vault' directory except the .obsidian directory to your repository
-
Install and enable the necessary plugins dataview and templater (templater needs to enable the 'Trigger Templater on new file creation' option)
-
Open the LifeOS Pro plugin configuration page in the 'third-party plugin'

- Click the 'activate upgrade' panel, input the email and activation code (usually in the email you received), and click the 'upgrade now' button at the bottom to upgrade to the latest version of the plugin

-
Restart Obsidian
-
The left sidebar will show the 'calendar', 'home', 'file new' icons, click to experience
-
Go to Pro Version to view more usage instructions
Scenario 3: Use Existing Example Repository
-
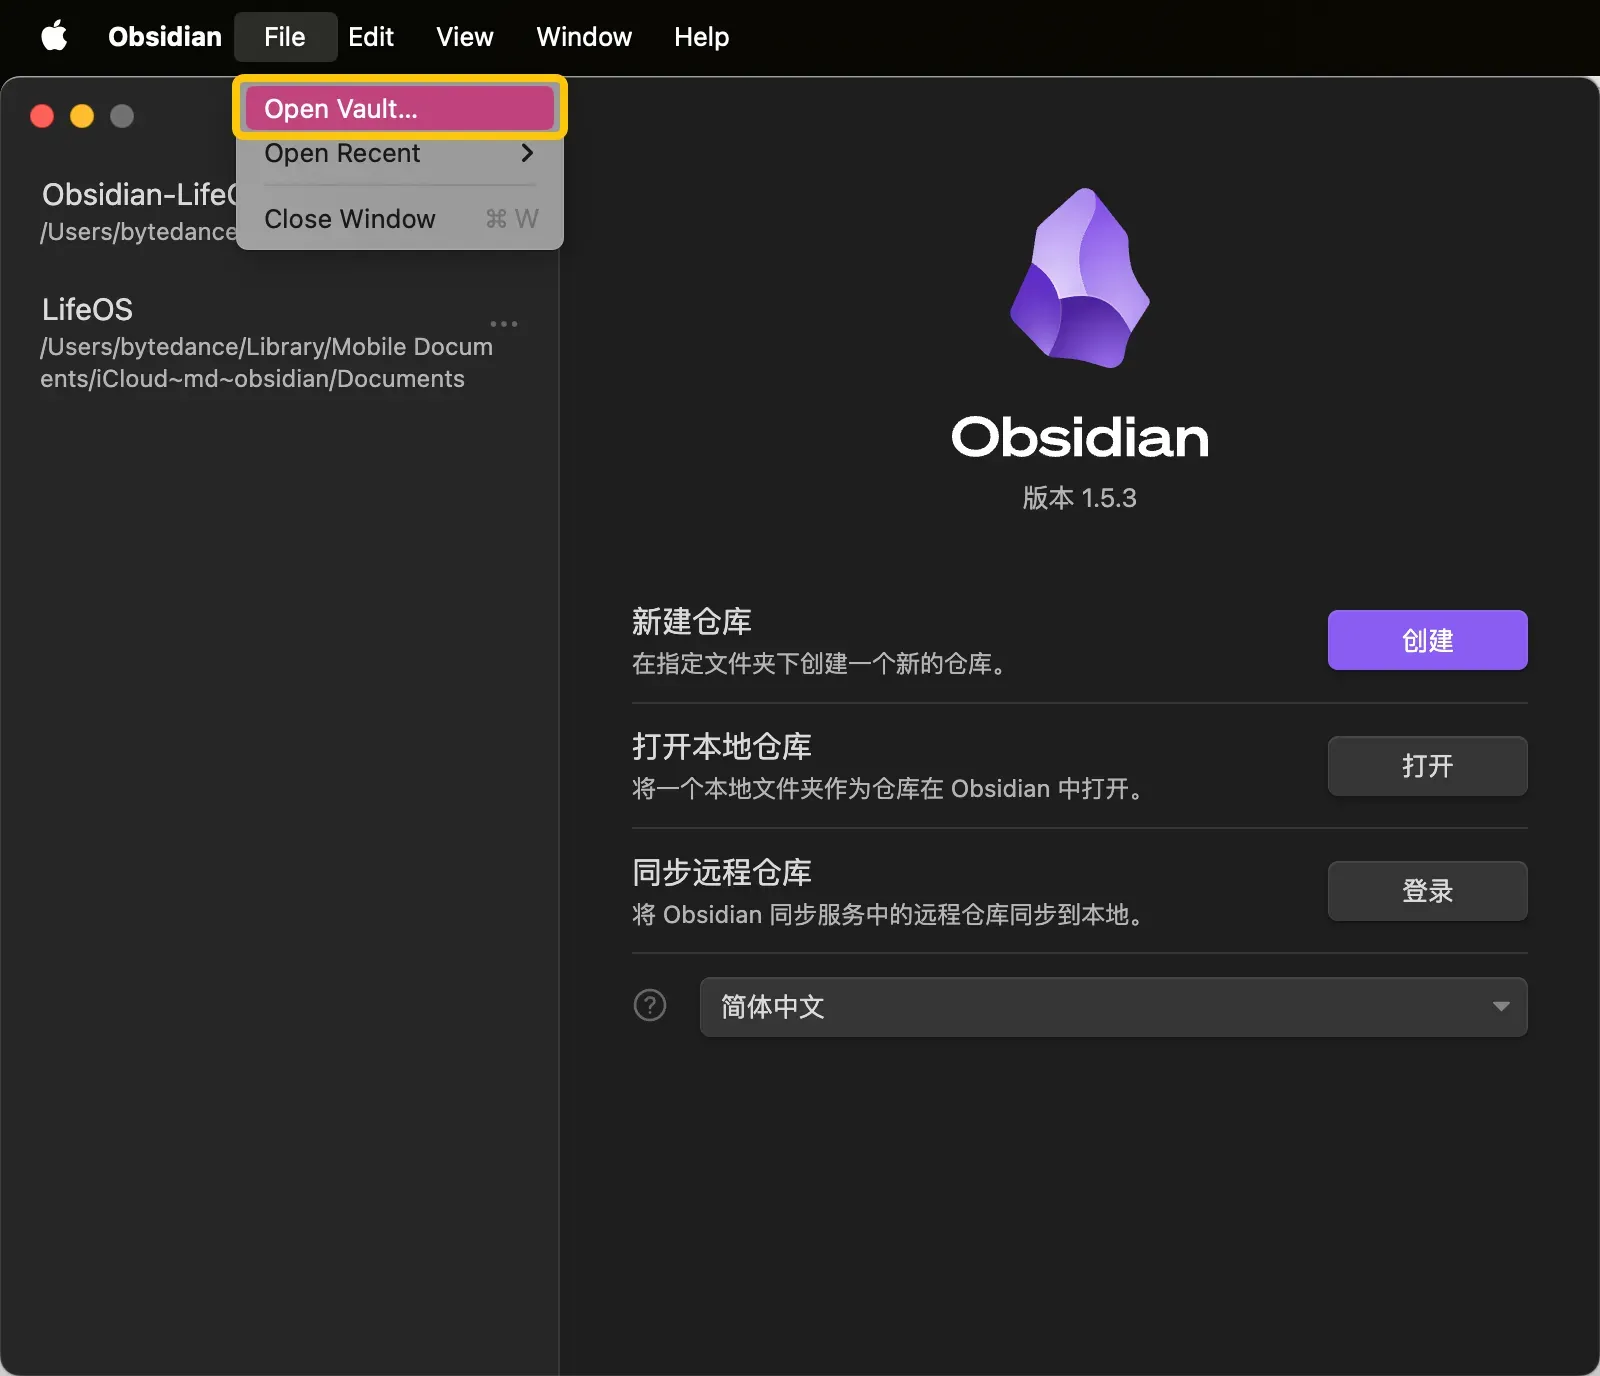
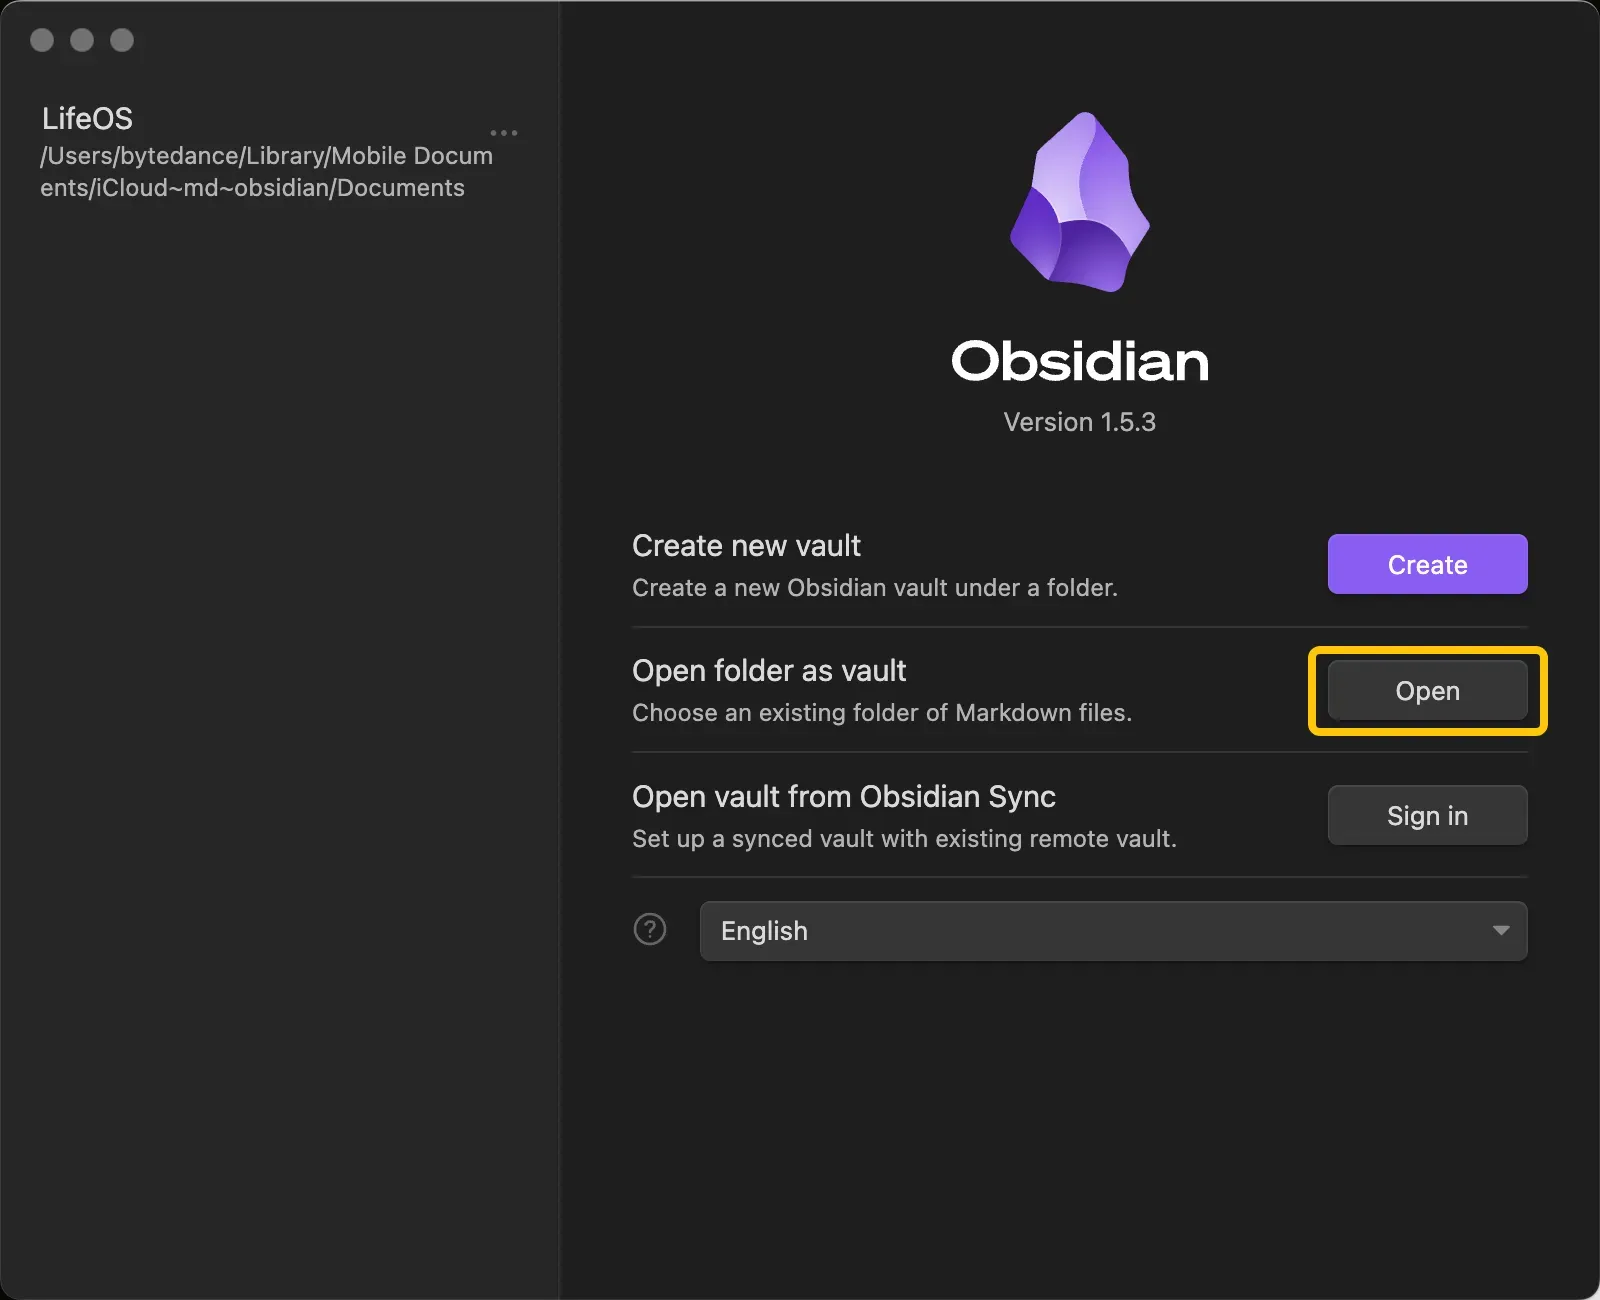
Open Obsidian software, follow the steps in the image, 'open local repository', select 'Example Vault/LifeOS PRO PARA Vault', remember to select 'trust repository author and enable plugin'!
-
Open the LifeOS Pro plugin configuration page in the 'third-party plugin'

- Click the 'activate upgrade' panel, input the email and activation code (usually in the email you received), and click the 'upgrade now' button at the bottom to upgrade to the latest version of the plugin
-
Restart Obsidian
-
The left sidebar will show the 'calendar', 'home', 'file new' icons, click to experience
-
Go to Pro Version to view more usage instructions
Next Step
Expand the left 'knowledge base directory', continue to read the current manual!